One of the newest — and most successful — entries into the indie game scene is "This War of Mine," developed and published by 11 Bit Studios. Previously known for mobile games such as "Anomaly" and "Sleepwalker's Journey," 11 Bit created a different kind of game altogether with its latest release, which has generated quite a following amongst the gaming community, particularly on the Steam platform.
Among the interesting aspects of "This War of Mine" is the game's tone; the premise is to observe a war from a civilian's perspective, rather than a soldier's. As a result, a large amount of character development is involved, deeply engrossing players in what it might be like to be a victim of a war. We spoke to members of the 11 Bit development team to find out what it was like to create these solemn representations of what happens to people in real life when the tragedy of war strikes their region.
- Dominik Zieliński – Lead & Character Artist
- Olaf Pożoga – Character Artist
- Przemek Marszał – Art Director & Project Lead
"This War of Mine" places heavy emphasis on the fact that civilian life can exist alongside an active war. How did this influence the way that characters were designed in the game?
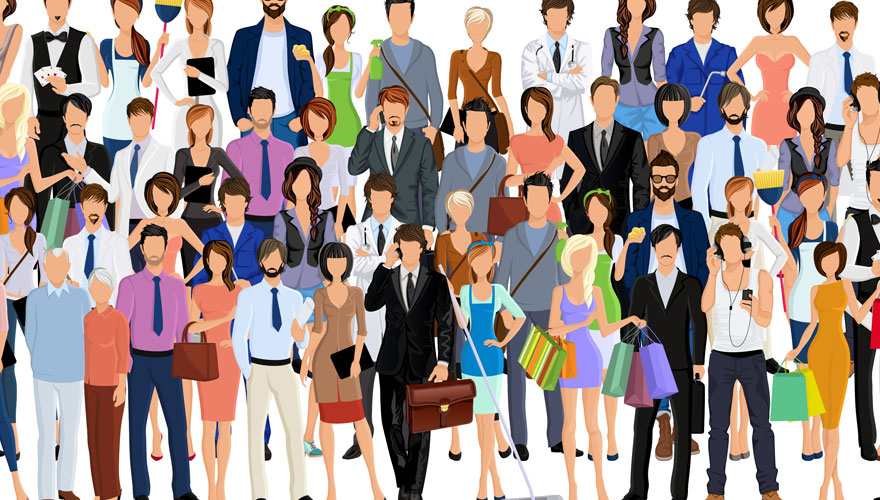
DOMINIK: When designing the characters for the game, at the back of our minds, we had a message: this war can happen to you. We needed characters that would naturally blend into the game setting and story, so it was a natural choice to go with character scanning. It added an extra layer of depth to the entire game experience. It also made the game more personal for us, because most of the scans were made from 11 Bit Studios team members. The end goal was to populate the game with ordinary, everyday people you might see on the street. This approach to make it plane paradoxically makes TWoM stand out, when you compare it to other games that usually try to sway you with monsters, space ships or miscellaneous eye candy.
 From a strictly technique perspective, we were really happy with how clothing turned out. It's important, because the characters are mostly fully clothed. We got good results with a minimal amount of man-hours; it would be more time-consuming to sculpt clothing or simulate it.
OLAF: Drawings in advance were unnecessary: this game is, as Dominik said, about civilians. About you, about us. So we just took exactly ourselves, put on some warmer clothes — and that’s it. Easy, but when you think about it — also very dangerous. Very true.
Did inspiration for characters come from any particular place? Are you (the designer) or others connected to similar sorts of grueling situations that appear in the game?
DOMINIK: The principle idea for “This War of Mine” was put forward by 11 Bit Studios CEO Grzegorz Miechowski, who was reading about different conflicts and horrible situations of people in war zones. He brought up the topic of the incredibly heavy emotional toll civilians need to carry when surrounded by war. I think TWoM captured that message and magnified it… made it reach more people. And, of course, that had an impact (along with other materials) on the way we were thinking about characters. It limited the amount of options we had, but in a good way. We couldn't make people look like they were confident, clean, happy or rested. That affects minute things like the rigging pose, for example. The way the characters walk, how they sneak. We've thrown away many animations that would do perfectly in a different game. Here — they were just out of place.
PRZEMEK: It wasn’t striking at first, but one of the messages of the game — war always happens at somebody’s doorstep — is really true, and it’s very sad. During production of TWoM, I was contacted by an artist from Donetsk in Ukraine. As you probably know, right this minute there's a war going on. He was looking for a job, as he had to leave his country. He was afraid that his family would suffer… afraid for their lives.
Did you learn anything about the life of civilians during the production of said characters? If so, what was most surprising?
PRZEMEK: Probably, this isn’t a rule for every conflict, but I was very surprised to learn that night is a safe time — and day is very dangerous. During the war in Sarajevo, there were a lot of snipers all around the corner of the city. They had a clear view during day, and you could find a lot of signs with "warning: sniper” everywhere. People prayed for a fog. Sadly, this didn’t stop them from moving around — and there were casualties. Night was different. You could hear huge cannons far away, could meet bands of scavengers. But still, it was a better time to move around. We’ve used this idea in TWoM, and so we have has this day/night cycle — with day in your shelter, and night away.
After seeing the massive success of the game, particularly within the Steam community, is there anything you would do differently?
DOMINIK: After the release, I was hooked to the Steam forums — searching for problems that people might have with graphics and animations. I couldn't find any. We still made some improvements in the patches that came after the release. The production pipeline in all areas significantly improved when compared to the early days. Processing scanned characters speed up from four to five days per character to one to two days. That's drastic. It would be nice to prepare with that speed from the beginning. We owe that improvement to experience we gathered, as well as upgrades in software we used.
OLAF: Each character that's created comes back to me after a while, so I can look for some defects. I do try to find as many mistakes as possible. As long as I'm able to spot all faults in my work, I can continue to evolve in what I do. What I lack in our characters is the fact they do not see each other — they always look ahead. So there is no eye-to-eye interaction. They don’t follow others with their head, and so on. Also, I wish people would react to the weather, for example. I would really be happy to see a character who goes under a strong wind and tries to maintain balance. Who tries to hold his or her hat that it isn't blown away.
Was it enjoyable or emotionally draining to create characters that are supposed to elicit negative emotions? Have you designed for anything darker than "This War of Mine?"
DOMINIK: Watching reference material during pre-production was emotionally draining. But that was absolutely imperative for us to know what we were dealing with. All the scanning sessions weren’t that dark. We were using a custom-built platform and putting people on a little merry-go-around. Most of our team switched their Facebook profile pictures to their scanned heads meshes. Having people from the team directly in the game was something new. The aim of all of our work was to recreate real people and their natural behavior inside the game in a creative way, but without adding anything unnecessary.
PRZEMEK: For me personally, the whole game was very draining. And this idea, put together with people scans, had a huge impact on me. As we said, most of the characters in game are us: developers. I was also scanned, but a message in the back of my head stopped me for using my mesh as a person you can play. It was too much. The idea that my scanned character could die … was too much. You can see me as a trader. He is a helping person, and won’t die. I know it's only my imagination, but I don’t want to cross that thin red line.