


Art Gallery: Synthesis - Toward A New Perception
- The Art Gallery submission deadline was 20 June 2008.
- Submission Rules
& Requirements: - Digital Performance
- Installations
- Monitor-Based Work
- Wall-Based Work
Color and quality can vary greatly from digital submission to printer and from printer to printer. It is important that the final artwork reflect what the jury has seen. This often requires using a professional printing service to make your final print. Large-format printers invariably deliver better results.
Suggested professional print output:
- Archival high-quality inkjet prints
- Iris prints
- UV-cured flatbed printing
- Lightjet printing
- Durable dye-based printing
It is also important to have your final artwork professionally framed and safely delivered.
- While sometimes costly, we recommend that you have your work framed by a professional framer.
- Pieces must use Plexiglas.
- Pieces should be matted with archival white mats.
- Frames should be strong enough to both structurally and aesthetically support the work.
- Work that arrives at SIGGRAPH Asia 2008 in substandard condition may be pulled from the show.
- We reserve the right to pull works that are not framed to the specifications outlined here. If the presentation of your piece differs significantly from our description, it is your responsibility to contact us to discuss this matter before shipping your piece(s).
Many beautiful artworks have arrived damaged because packaging and framing were inadequate. When you build a crate to ship your work, please follow these guidelines:
Materials:
- Resong Board (from a building-supply company) approximately _ cm x 15 cm x 30 cm (or necessary length)
- 122-cm X 244-cm x 2.5-cm Dow Board or other foam insulation board
- 0.3-cm plywood (luan) or paneling (whichever is cheaper)
1. Measure framed piece.
Example: 72 cm x 110 cm x 8 cm
2. Add _-cm clearance to height and width and _-cm
clearance to depth.
Example: 75 cm x 115 cm x 15 cm
3. Add 5 cm to new size.
Example: 80 cm x 120 cm x 20 cm
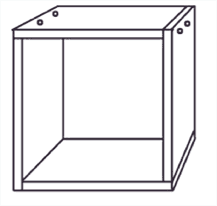
This is the interior size of the box.
4. Rip Resong to correct width. Cut and
build box as shown in Diagram A. (Add _ cm to interior.)
5. Cut luan pieces, 2 @ 31 _ cm x 394 cm.
6. Build box using all-purpose screws to join and wood
glue.
7. Glue and nail luan to bottom (use 3-cm nails
with heads).
8. Cut dow boards.
Use measurements from instruction #3 for height and width.
Use measurements from instruction #2 for sides.
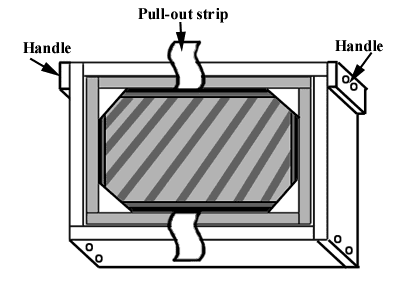
9. Cut linen strip 10 cm wide x approximately 40 cm
added to shortest interior side of box for pull-out strip.
10. Install foam into box.
11. Lay pullout strip inside and over edges.
12. Install framed art padding corners and sides (use
thin green packing foam strips or other thin packing material)
See Diagram B.
13. Install top piece of foam and attach top using _-cm
#6 Phillips screwdriver and drive wood screws and #6 finish
washers to close. (Space approximately 15 cm apart.)
14. Using a belt sander, ease together edges of box.
15. For ease in handling, 7.5-cm wide wooden "handles"
can be added. See Diagram B.
